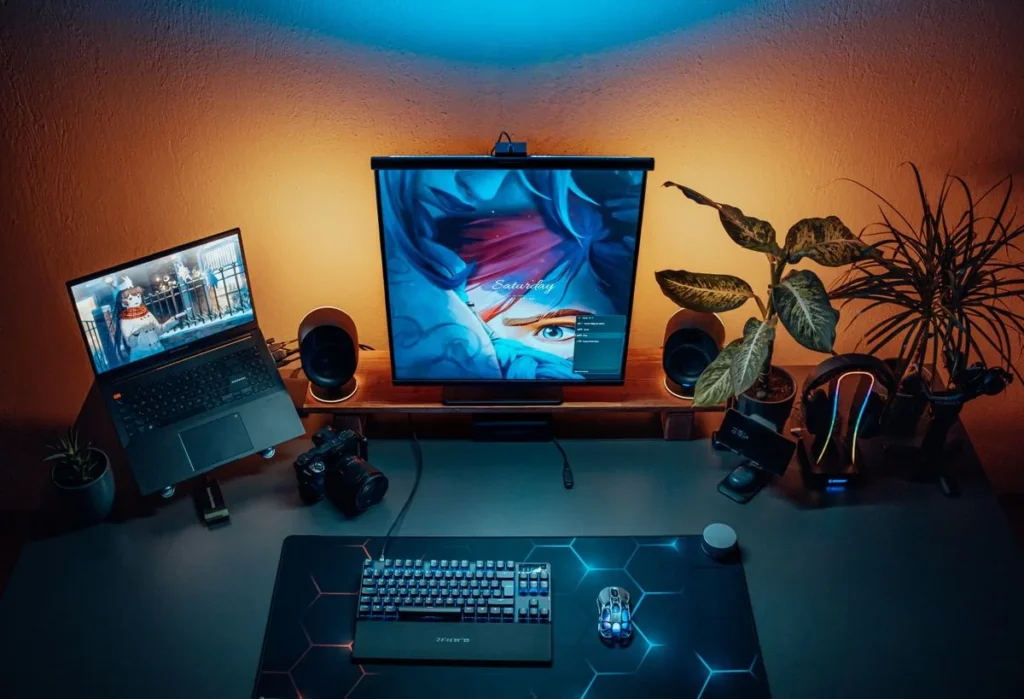
How to Set Up Dual Monitors for WFH (Step by Step)
To set up dual monitors for work from home: center your primary screen in front of you, put the secondary beside or above it, position both an arm’s length away with tops at eye level, connect via HDMI, DisplayPort, or USB-C (some MacBooks need a DisplayLink dock), then arrange displays in your OS settings and match brightness. Budget 30 minutes.
Two screens is the highest-ROI upgrade most remote workers ever make — a University of Utah study found dual monitors cut task time by up to 33 percent for common office work. The setup is mostly decisions, not difficulty: work the seven steps below in order and you’ll be done in about half an hour.
Step 1: Plan Your Layout — Side-by-Side or Stacked?
Start by deciding where the second screen goes. There are two layouts worth considering.
Side-by-side puts both screens next to each other — the default when both monitors match, e.g. two 24-inch or 27-inch panels. The primary screen sits dead ahead; the secondary sits to one side for email, chat, or documentation. Both screens stay within a comfortable field of view, so this layout produces the least neck strain.
Stacked mounts one screen above the other — the answer for narrow desks (under 26 inches deep), mismatched monitor sizes, or a lightweight reference display like a Slack feed or dashboard. The tradeoff is vertical head movement, so always type on the lower screen.
The quotable rule: if both screens do real work — code plus preview, spreadsheet plus email — go side-by-side; if one screen is just a reference feed you glance at, stack it above.
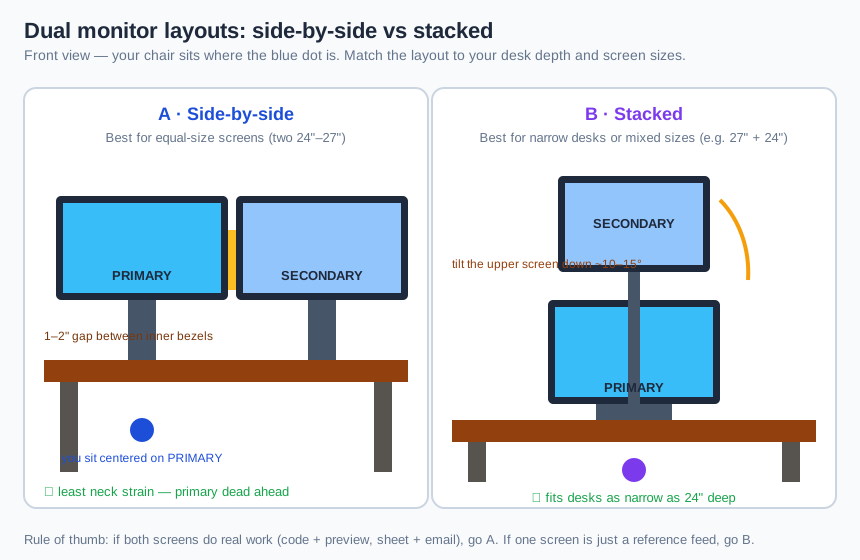
Measure your desk before buying anything: two 27-inch monitors side-by-side need about 48 inches of width; stacked, the same pair fits in 24–28 inches but needs a sturdy mount and clearance under any shelf above.
Step 2: Pick Your Mounting — Stock Stands or a Monitor Arm?
The stands in the box work, but each eats 6–8 inches of desk depth and locks its screen at one fixed height. A monitor arm clamps to the desk edge, lifts screens off the surface, and adjusts height, tilt, and rotation in seconds — which also makes side-by-side alignment (no height mismatch, tiny bezel gap) trivial.
Every cell below stands on its own — no cross-referencing needed.
| Mount option | What you get | Fits which monitors | Typical cost (Oct 2026) | Watch out for |
|---|---|---|---|---|
| Stock stands (in the box) | Free, zero installation | Any monitor as shipped | $0 | Fixed height, eats 6–8″ of desk depth each, hard to align two screens |
| Dual monitor arm | Two screens on one pole or two articulated arms, full adjustability | Two screens up to ~32″ each, VESA 75×75 or 100×100, 2–9 kg per arm | ~$60–$150 | Desk edge must be solid wood or metal; glass desks need a grommet mount |
| Two single monitor arms | Independent positioning of each screen — ideal for mixed sizes | Any VESA-compatible screen; great for a 27″ + vertical 24″ combo | ~$35–$50 each | Two clamps need ~4″ of free desk-edge width |
| VESA adapter brackets | Clamps a non-VESA monitor (many budget panels) onto a standard arm | Monitors without VESA holes, e.g. some Dell and LG budget models | ~$15–$30 | Adds ~1″ of depth behind the screen; check the adapter’s weight rating |
The quotable rule: the stands are free and the arm is the upgrade you feel every single day — desk space, posture, and alignment all improve at once.
Check the back of your monitors for the four-hole VESA pattern (75×75 mm or 100×100 mm) before ordering — most 22-to-34-inch monitors include it, and adapter brackets cover the budget models that don’t. Compare arms in our best dual monitor arm roundup, and decode hole patterns and weight limits in VESA mount explained.
Step 3: Get the Cables Right — HDMI, DisplayPort, or USB-C?
Cables cause most dual-monitor headaches and are the cheapest thing to get right. Match the cable to the ports on both the computer and the monitor, and buy certified cables for 4K. Every cell in the table below stands on its own.
| Cable type | Best for | Max common spec | Carries audio? | Carries power? | Watch out for |
|---|---|---|---|---|---|
| HDMI 2.0 | Most Windows laptops and older desktops; TVs as second screens | 4K at 60Hz, 1440p at 144Hz | Yes | No | Cheap 15-foot cables often fail at 4K/60 — keep runs under 10 feet or buy certified |
| DisplayPort 1.4 | Desktop GPUs and business laptops with DP or mini-DP | 4K at 120Hz, 8K at 60Hz, daisy-chaining two 1440p screens | Yes | No | Mini-DisplayPort needs an adapter on newer USB-C laptops |
| USB-C (DisplayPort Alt Mode) | Modern laptops with one-cable docking | 4K at 60Hz per port (varies by laptop) | Yes | Yes — up to 100W on most docks | Not every USB-C port carries video — look for the DisplayPort or Thunderbolt logo next to the port |
| Thunderbolt 3/4 | MacBooks and premium Windows ultrabooks driving two 4K screens | Two 4K at 60Hz from one port via a dock | Yes | Yes — up to 90W+ | Docks cost $150–$300; the cable itself must be Thunderbolt-rated, not just USB-C |
The Mac exception you must know: base Apple Silicon chips (M1 through M4 in the MacBook Air and 13/14-inch Pro) support only one external display natively — two externals need a DisplayLink dock (e.g., Plugable UD-6950H, ~$150–$200 as of October 2026) plus the free DisplayLink Manager app. Pro/Max/Ultra chips (M1 Pro and newer) drive two or more directly.
The quotable rule: match the cable to the weakest port in the chain — a $5 cable on a $500 monitor is the most common cause of “my second screen flickers.”
Plug each monitor directly into the computer when you can — daisy-chaining adds a failure point. Label cables when both screens share a connector type. And if a monitor offers both HDMI and DisplayPort, prefer DisplayPort for the primary screen: it handles high refresh rates and multi-stream transport more reliably.
Step 4: Configure Display Settings on Windows
With both screens connected and powered on, press Win + P and choose Extend — never Duplicate, which mirrors one image on both screens and wastes the second one.
Then open Settings → System → Display:
- Click Identify — big numbers appear on each screen so you know which is which.
- Drag the numbered rectangles to match your physical layout. The mouse crosses between screens exactly where the rectangles touch — get this right.
- Set “Make this my main display” on your primary screen — the taskbar and new windows open here.
- Set Scale per screen — 100% for 24-inch 1080p, 125% for 27-inch 1440p, 150% for 27-inch 4K. Each screen scales independently, which fixes text that looks tiny on one monitor and huge on the other.
- Under Advanced display settings, confirm native resolution and the highest refresh rate on each screen — Windows sometimes defaults to 59.94Hz, so bump it up.
The quotable rule: Extend, don’t Duplicate — and the on-screen rectangles must mirror your desk, or your cursor will teleport to the wrong edge.
Step 5: Configure Display Settings on macOS
On a Mac, open System Settings → Displays with both monitors connected:
- Leave Mirror (“Use as Mirror”) off so each screen shows its own desktop.
- Drag the display icons to match your physical arrangement, just like Windows.
- The white menu bar at the top of one icon marks the main display — drag it to your primary screen.
- Choose scaling per display: Default suits most 27-inch 1440p panels; More Space adds room on 4K screens; Larger Text helps smaller or distant screens.
- On a DisplayLink dock, install DisplayLink Manager and grant it screen-recording permission when prompted — without it, dock-driven screens stay dark.
For mixed-size pairs: the cursor crosses along the shared edge proportionally, so align the smaller screen’s icon with the part of the big screen you actually use — mouse movement feels natural.
Step 6: Dial In Ergonomic Positioning
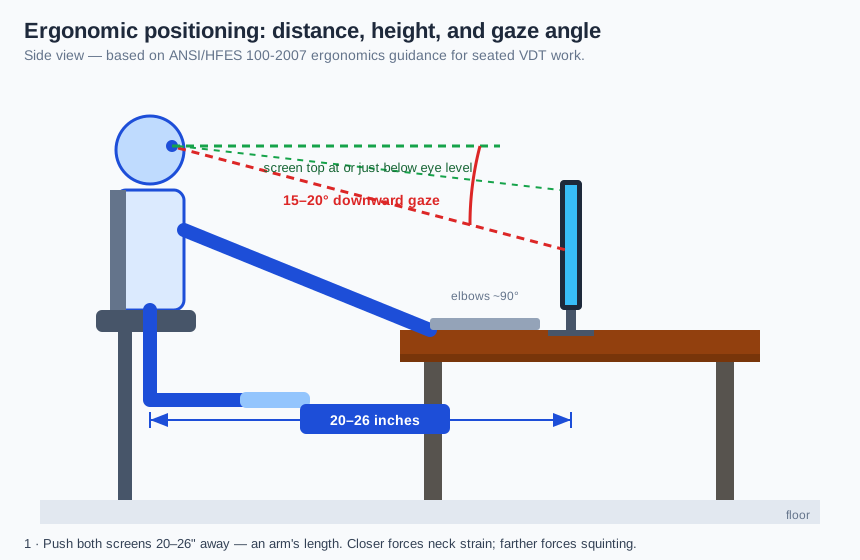
Hardware connected, software arranged — now position everything so your body survives eight hours a day. These numbers follow the ANSI/HFES 100-2007 ergonomics standard for seated screen work, still the reference as of October 2026.
- Distance: 20–26 inches from your eyes — about an arm’s length. Closer forces constant refocusing; farther makes you lean and squint.
- Height: the top of each screen at or just below eye level. If you look up at the screen, lower it or raise your chair.
- Gaze angle: aim for a 15–20° downward gaze to the screen center — your neck stays neutral instead of craning.
- Primary centered: your primary monitor goes dead ahead; the secondary within a 30° head turn. Constantly rotating past 30° to read the second screen is the classic dual-monitor injury.
- Match brightness: set both screens to similar brightness and color temperature — mismatched screens (one bright white, one dim yellow) force your eyes to work measurably harder. Most monitors have a 6500K or “warm” preset to start from.
Go deeper in our dual monitor ergonomics guide, and complete the setup with keyboard and mouse positioning — a perfect monitor arrangement still fails if your keyboard forces your shoulders up. Follow the 20-20-20 rule: every 20 minutes, look 20 feet away for 20 seconds.
Step 7: Troubleshoot Flicker, Detection, and Lag
If something misbehaves, work through this checklist before buying anything:
- Second monitor not detected: power-cycle the monitor and reseat the cable at both ends. Try a different port — some laptop HDMI ports need the cable connected before boot. Update your GPU drivers; stale drivers are the #1 cause of “it worked yesterday.”
- Flickering or cutting out: confirm the refresh rate on both ends, then try a shorter or certified cable — marginal cables flicker at higher resolutions. Turn off HDR if only one screen supports it.
- Wrong resolution or blurry text: confirm native resolution, then adjust per-screen scaling (Steps 4–5). On Windows, sign out and back in after changing scaling.
- Lag on a DisplayLink-driven Mac screen: DisplayLink compresses the video stream, so fast motion can lag slightly on dock-driven screens. Put video calls on the directly-connected screen and static reference material on the DisplayLink one.
- Cursor stuck at the screen edge: the on-screen arrangement doesn’t match the desk — redo Step 4 or 5 and align the rectangles precisely.
The quotable rule: when a second monitor misbehaves, suspect the cable first, the driver second, the settings third.
Frequently Asked Questions
Do I need two identical monitors for a WFH setup?
No, but matching size and resolution makes life easier. When both screens share resolution and pixel density, dragged windows look identical and your eyes adjust less. If you mix — say a 27-inch 1440p primary with a 24-inch 1080p secondary — put the better screen dead ahead.
Can my laptop handle two external monitors?
Most Windows laptops can; MacBooks depend on the chip. Any Windows laptop with HDMI plus a video-capable USB-C/Thunderbolt port drives two externals. Base M1–M4 MacBooks support one external display natively and need a DisplayLink dock (~$150–$200 as of October 2026) for two; Pro/Max chips handle two or more directly.
What is the best resolution for dual work-from-home monitors?
27-inch 1440p (QHD) is the sweet spot as of 2026. It gives ~78% more screen area than 1080p without 4K’s scaling fiddliness, and quality 27-inch 1440p IPS panels start around $150–$200. Go 4K only for video/photo editing — otherwise you’re paying for pixels your eyes can’t use at 26 inches.
Should the second monitor be vertical (portrait)?
Only for document- or code-heavy work. A 24-inch monitor rotated 90° shows a full document page or ~80 lines of code with no scrolling. For email, chat, spreadsheets, and calls, landscape wins — and most arms rotate in seconds, so experiment.
How much desk space do two monitors actually need?
Two 27-inch monitors side-by-side need about 48 inches of desk width; stacked, 24–28 inches. Those figures assume monitor arms — stock stands add depth. Measure before ordering, and leave the chair room to sit centered on the primary screen.
Do I need a docking station for a dual monitor laptop setup?
Only if one USB-C port must carry both video outputs, or you’re on a base-chip MacBook. A good USB-C/Thunderbolt dock (~$150–$300 as of October 2026) turns one cable into two monitor outputs plus charging and USB — one plug when you sit down. With two separate video-capable ports, skip the dock and plug in directly.
The Bottom Line
Dual monitors come down to seven decisions: side-by-side or stacked, stands or an arm, the right cables (watch the Mac single-display limit), Extend mode with rectangles matching your desk, per-screen scaling, the 20–26 inch ergonomic triangle, and the cable-driver-settings troubleshooting order. Get those right and the second screen disappears into your workflow — which is exactly the point. Still choosing hardware? Our best dual monitor arm guide covers mounting both screens properly.