
How to Organize Desk Drawers (2026)
To organize desk drawers, empty every drawer completely, sort items into keep, toss, and relocate piles, then assign each drawer a zone — daily items in the top drawer, weekly items in the middle, archives at the bottom — and fit adjustable dividers so every category has its own compartment. Finish with the one-in-one-out rule: every new item that enters a drawer means one old item leaves. The whole project takes 1–2 hours for a typical home office desk.
Why do desk drawers always get messy again?
Most drawer cleanouts fail within a month, and it is not a discipline problem — it is a systems problem. A drawer with no internal structure is just a box, and boxes obey one law: loose items migrate toward maximum entropy. Pens slide under notebooks, cables tangle with chargers, and the drawer becomes a place where things disappear instead of a place where things live.
The second failure mode is over-categorization. A drawer carved into fourteen micro-compartments for items you use twice a year is decoration, not organization — the moment you are in a hurry, the system is too fussy to use and the drawer reverts to a junk drawer.
The fix is boring and effective: fewer, bigger zones matched to how often you actually reach for things, with dividers that physically prevent migration. Structure the drawer around your behavior and it stays organized with almost no effort.
The quotable rule: Organize by frequency of use, not by category — the drawer should mirror your hands, not a filing manual.
What is the desk drawer zone system?
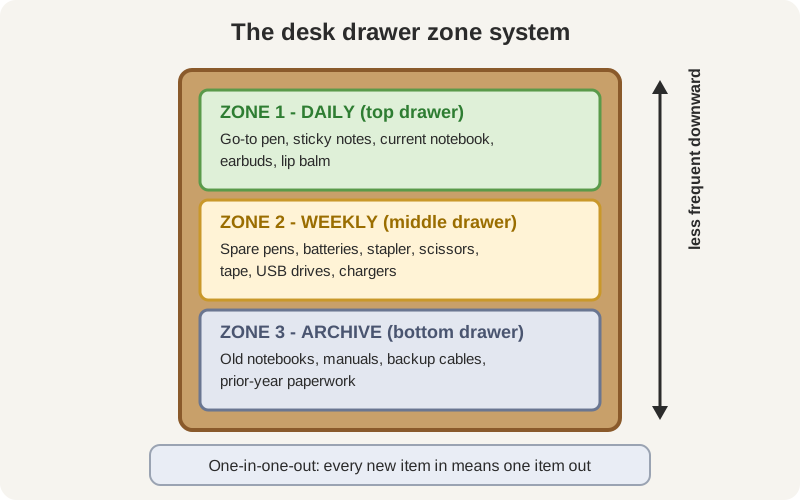
The zone system assigns each drawer (or section of a drawer) a job based on how often you need what is inside. Three zones cover nearly every home office.
Zone 1 — Daily (top drawer)
The items you touch every workday: your best pen, a highlighter, sticky notes, the notebook you are currently using, lip balm, hand lotion, earbuds. This drawer should open to exactly what your hand expects. If you reach into the top drawer more than a few times a day and anything in it surprises you, it does not belong in Zone 1.
Zone 2 — Weekly (middle drawer)
Things you need regularly but not daily: spare pens and batteries, envelopes and stamps, a stapler, scissors, tape, USB drives, chargers you rotate through. This zone can tolerate slightly more density because you visit it with intention, not on autopilot.
Zone 3 — Archive (bottom drawer)
Reference material and rarely touched supplies: old notebooks, manuals, backup cables, tax documents from prior years, the spare everything. Zone 3 is allowed to be boring — its job is to keep infrequently used items findable without clogging the zones you touch every day. Paperwork that outgrows Zone 3 belongs in a filing cabinet, not stacked higher in the drawer.
What if you only have one drawer?
Stack the zones vertically inside it: daily items in a shallow tray at the front, weekly items behind them, and archive material at the very back or in a separate lidded box. Even a single drawer works when front-to-back position encodes frequency.
How do you organize desk drawers step by step?
Block 1–2 hours. Do all the drawers at once — organizing one drawer while the others stay chaotic just moves the mess around.
1. Empty every drawer completely
Pull each drawer out and dump its contents onto the desk or a table. Every drawer, all at once. This is non-negotiable: you cannot organize what you cannot see, and drawers hide a shocking amount of dead weight behind the items you actually use.
2. Sort into four piles
Make four piles and be ruthless:
- Keep in this drawer — used at least monthly, belongs at this desk.
- Relocate — belongs somewhere else in the house (kitchen scissors, the good tape measure, random screws).
- Toss or recycle — dried-out pens (test every single one), dead batteries, expired anything, manuals for devices you no longer own, cables for ports that no longer exist.
- Donate or shred — usable items you will never use; papers with personal data get shredded, the rest recycled.
The average desk drawer surrenders 30–50% of its contents at this step. That reclaimed space is what makes the zones possible.
3. Wipe the drawers clean
Vacuum or wipe out each empty drawer. Crumbs, dust, and the mysterious sticky spot all leave now. Line the drawers if you like — non-adhesive shelf liner keeps organizers from sliding and makes the next cleanout faster.
4. Measure before buying anything
Measure each drawer’s interior: width, depth, and height. Write the numbers on your phone. Dividers bought on guesswork are the number-one source of organizer regret — a tray that is half an inch too wide is useless, and “standard drawer size” is a myth.
5. Assign zones, then fit dividers
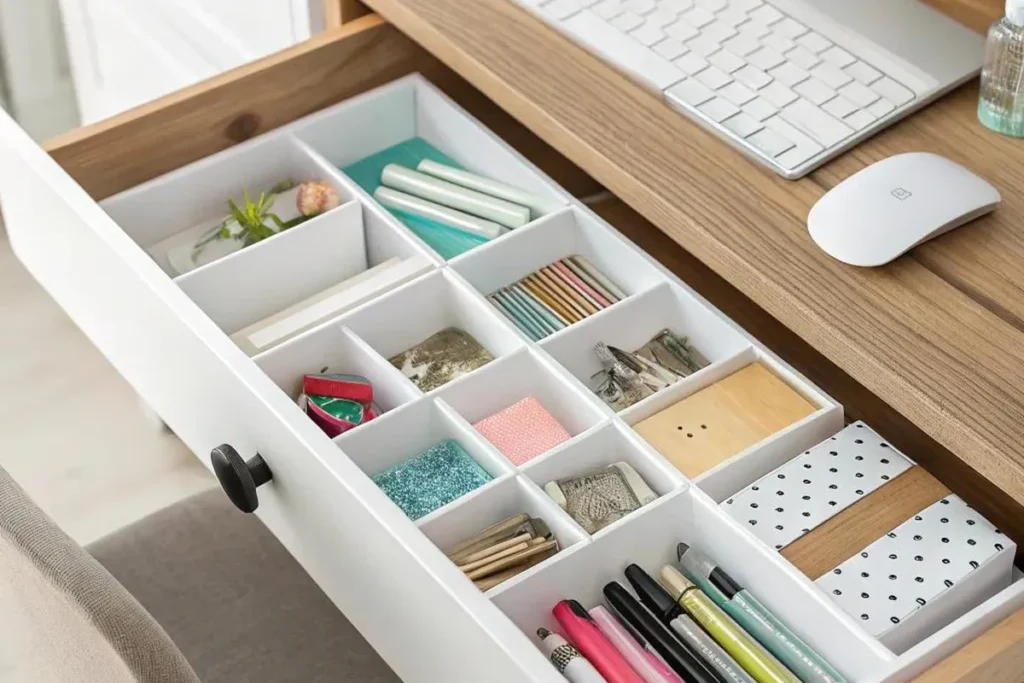
Decide which drawer is Zone 1, 2, and 3 first, then choose dividers to fit the zones — not the other way around. A top daily drawer usually wants a shallow tray with 4–6 compartments; a deep middle drawer wants adjustable dividers or stackable bins. Our roundup of the best desk drawer organizers covers the divider types that hold up over time.
6. Put everything back by frequency
Return Zone 1 items to the top drawer, Zone 2 to the middle, Zone 3 to the bottom. Every category gets its own compartment — pens in one, sticky notes in another, cables coiled in theirs. If a category does not fit its compartment, the category is too big, not the compartment too small: split it or demote the overflow to a lower zone.
7. Label what needs labeling
You do not need a label maker for a home office, but a strip of painter’s tape with “batteries” or “USB-C cables” on a compartment pays off within weeks — especially if anyone else in the household opens these drawers. Labels are also a tripwire: when an unlabeled item appears, you notice immediately.
What dividers and organizers actually work?
Not all organizers survive contact with real life. Here is how the common types compare for desk drawers specifically.
| Organizer type | Best for | Watch out for |
|---|---|---|
| Bamboo or wood trays | Top daily drawers; look good, compartments stay put | Fixed compartment sizes — measure first |
| Adjustable spring dividers | Deep drawers; expand to fit the exact width | Can slip if the drawer interior is slick — pair with liner |
| Stackable plastic bins | Weekly supplies in deep drawers; cheap and modular | Light bins slide around; get ones with non-slip feet |
| Small lidded boxes | Archive zone; keeps rarely used items dust-free | Out of sight means forgotten — label the lids |
| Drawer-depth pen trays | Narrow side sections of any drawer | Only fit standard drawers; check depth |
| Cable organizers / velcro ties | The cable corner every drawer develops | Coil cables before storing, or the ties just decorate a tangle |
The pattern: the best organizer is the one that cannot move. Compartments that slide around the drawer defeat the entire purpose, because migration is the enemy. Non-slip liner underneath, snug fits, and lids on archive boxes are what make the system hold past month two.
What is the one-in-one-out rule?
The one-in-one-out rule is the maintenance system that keeps the zones working: every time a new item enters a drawer, one existing item leaves it. Buy a new pen? An old one goes in the donate pile. A new cable arrives? The frayed spare gets recycled.
It sounds strict, but it is the only rule that fights the real enemy — gradual accumulation. Drawers do not get messy in one dramatic event; they get messy one “I might need this” item at a time, until Zone 1 is full of Zone 3 material. One-in-one-out caps each drawer at its current volume forever.
Three companion habits make it stick:
- The 30-second reset. When you close the laptop for the day, spend 30 seconds returning strays to their compartments. A drawer that gets a daily reset never needs another 2-hour overhaul.
- The landing pad. Keep a small tray on the desk for in-progress items (the receipt you need tomorrow, the form half-filled). It absorbs the clutter that would otherwise colonize the top drawer.
- The quarterly purge. Every three months, open each drawer and pull anything that has not been touched since the last purge. Demote it a zone or remove it. Ten minutes, four times a year.
How do you organize a deep desk drawer differently?
Deep drawers (the file-drawer style, 8+ inches tall) defeat shallow trays — items vanish into the vertical space. Treat them as filing cabinets, not boxes.
- File vertically. Stand notebooks, folders, and manuals upright like books, using a small bookend or file sorter. Vertical storage lets you see every spine at a glance; stacked storage hides everything below the top item.
- Stack with stackable bins. Two or three stackable bins turn one deep drawer into two or three shallow ones. Label the front of each bin.
- Reserve the bottom for the truly rare. Deep drawers are Zone 3 by nature. If your desk has one deep drawer and two shallow ones, the deep drawer is your archive — do not fight it by putting daily items at the bottom of a well.
- Hanging files for paperwork. A simple hanging-file frame converts a deep drawer into a proper file drawer. Current-year documents hang in front, prior years behind, and anything older moves to the filing cabinet.
Frequently asked questions
How do I keep my desk drawers organized long-term?
Use the zone system (daily, weekly, archive), give every category its own fixed compartment with dividers that cannot slide, and follow the one-in-one-out rule so no drawer ever gains net volume. Add a 30-second end-of-day reset and a 10-minute quarterly purge, and the system maintains itself.
What should I keep in my top desk drawer?
Only what you touch nearly every workday: your go-to pen, sticky notes, the current notebook, earbuds, and small personal items like lip balm or hand lotion. If you use it weekly rather than daily, it belongs in the middle drawer — the top drawer is prime real estate and should feel almost empty.
Are drawer dividers worth it?
Yes — they are the single highest-impact purchase in drawer organization. Without dividers, items migrate and the drawer reverts to chaos within weeks; with snug-fitting dividers, each category stays in its compartment indefinitely. Measure your drawer interiors first, since “standard” sizes vary and an ill-fitting tray is useless.
How do I organize a desk drawer without buying organizers?
Use small boxes you already own — phone boxes, tea tins, and cut-down cereal boxes work as compartments. Line the drawer with shelf liner so they do not slide, and assign each box a category. It is less pretty than bamboo trays but functionally identical, and it costs nothing.
What do I do with all the cables in my desk drawer?
First, test every cable and recycle the ones for dead devices — most drawer cable nests are 50% obsolete. Coil the survivors with velcro ties (never tight rubber bands, which damage insulation), group them by type in one compartment or a small pouch, and label the pouch. One cable compartment, not cables scattered across every drawer.
How often should I declutter desk drawers?
Do a full empty-and-sort once or twice a year, and a 10-minute purge every three months to demote anything untouched. With the one-in-one-out rule running in the background, the big cleanouts get faster each time — the second annual declutter typically takes half as long as the first.
An organized drawer is not about having less stuff — it is about every item having an address. Give everything an address, defend the addresses with dividers, and the drawer takes care of itself.