
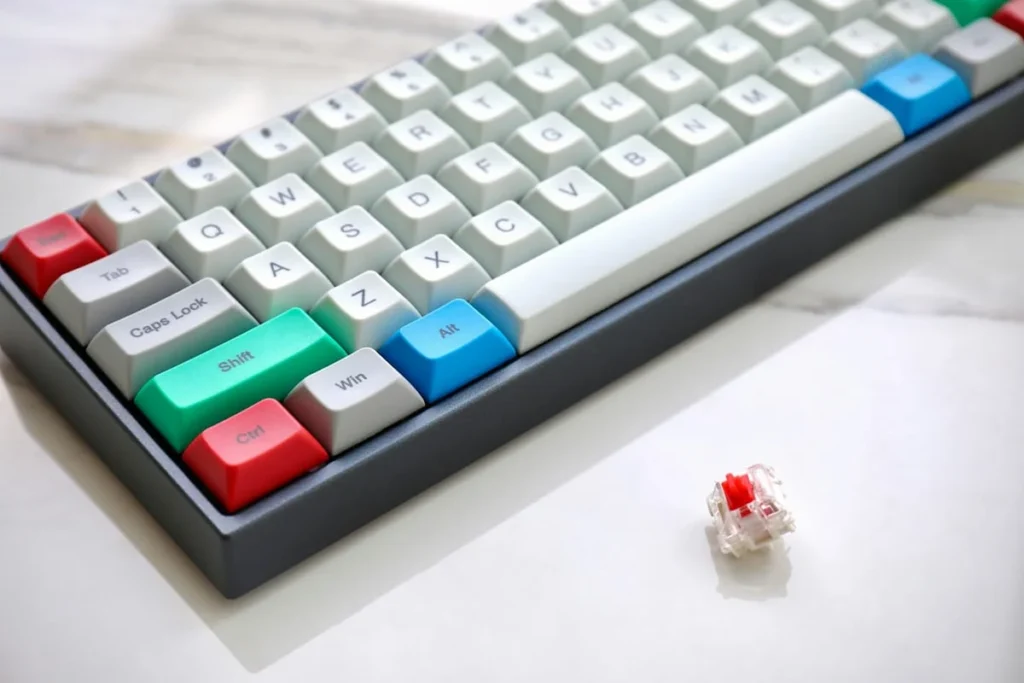
How to Clean a Mechanical Keyboard (2026)
To clean a mechanical keyboard, unplug it, remove the keycaps with a keycap puller, brush debris from the exposed switches, soak the keycaps in warm soapy water, wipe the plate with a damp cloth, dry everything completely, then reassemble. A deep clean like this takes 30–45 minutes and should be done every 3–6 months depending on your environment.
Why does a mechanical keyboard need a different cleaning routine?
A mechanical keyboard collects debris in places a membrane keyboard never reaches. Each key sits on its own tall switch, and the gaps between switches act like tiny traps for crumbs, dust, pet hair, and the oils from your fingertips. Shake a year-old board upside down and you will hear it rain.
Because the keycaps are removable, you can actually get at the grime instead of just blowing it around. But the switches themselves are precision mechanisms with metal contacts and springs inside. Flood a switch with liquid and you can corrode the contacts or wash away the factory lubricant, leaving you with a scratchy, unreliable key. The whole point of a teardown-light clean is to get aggressive with the removable plastic parts and stay gentle with the electronics.
The quotable rule: Clean the plastic like dishes, treat the switches like electronics.
What do you need to clean a mechanical keyboard?
You probably own most of this already. The one tool worth buying is a wire keycap puller (about $5–8) — plastic ring pullers that come free with keyboards work, but they can scratch keycap sides if you twist.
Supplies checklist
- Wire keycap puller
- A bowl of warm water with a drop of mild dish soap
- Soft-bristle brush (an old soft toothbrush works, or a small electronics brush)
- Microfiber cloths (2–3)
- Cotton swabs
- A can of compressed air or an electric air duster
- Optional: isopropyl alcohol (70%+) for stubborn grime, denture cleaning tablets for yellowed keycaps
- A towel or drying rack for the keycaps
What NOT to use
| Tool or cleaner | Why it is a bad idea |
|---|---|
| Dishwasher | Heat warps keycaps; water pressure and heat destroy switches and the PCB |
| Soaking the keyboard itself | Liquid seeps into switches and the circuit board and corrodes contacts |
| Bleach or harsh solvents | Dissolves keycap legends, melts ABS plastic, damages coatings |
| Hair dryer on hot | Concentrated heat warps keycaps and can melt switch housings |
| A vacuum with a stiff brush head | Static discharge can damage the PCB; strong suction can pull switches loose on hot-swap boards |
| Paper towels on glossy keycaps | Paper is abrasive enough to leave micro-scratches on shine-prone ABS |
If you type all day on your board, a wrist rest also deserves a wipe-down while you are at it — fabric rests collect skin oils fast.
How do you clean a mechanical keyboard step by step?
Set aside 30–45 minutes. Work on a clear table with a towel down, and take a photo of the keyboard before you start — you will thank yourself during reassembly.
1. Unplug and power down
Disconnect the USB cable. If it is a wireless board, switch it off and remove the batteries or disconnect the charging cable. Never clean a keyboard that is still powered — stray water on a live circuit board is how keys die.
2. Photograph the layout
Take a clear top-down photo of the keyboard, especially if it is a 60%, 65%, or 75% layout where the keys are not all standard sizes. This is your reassembly map. If you have the layout memorized, skip this — everyone else, do not skip it.
3. Remove the keycaps
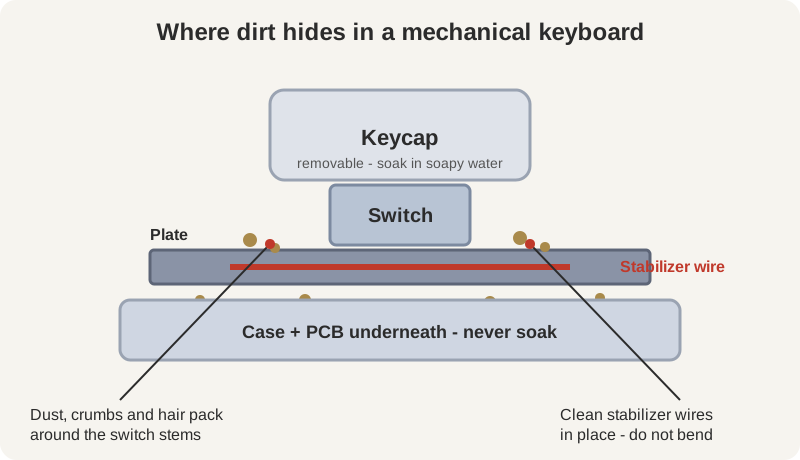
Hook the wire puller under opposite sides of a keycap and pull straight up with steady pressure. Work from one corner across, placing keycaps in the bowl as you go. For long keys — spacebar, enter, shift, backspace — pull gently and straight; these sit on stabilizers with metal wires that bend if you yank sideways.
Leave the stabilizer wires in place. You are not disassembling the board, just lifting the caps off.
4. Shake out the loose debris
Hold the bare keyboard upside down over a trash can and shake firmly. Then flip it face-up and blast between the switches with compressed air, holding the can upright so no propellant liquid sprays out. Short bursts work better than one long blast, which can drive debris deeper.
5. Brush each switch
With a soft-bristle brush, sweep around every switch stem and the plate between switches. Use light pressure — you are dislodging dust, not scrubbing grout. A cotton swab reaches the tight corners around stabilizers. This is the step that transforms a keyboard from “dusty” to “new,” because the plate area is what you actually see between the keys.
6. Soak the keycaps
The keycaps are already sitting in warm soapy water from step 3. Let them soak 15–30 minutes, then swish them around and rub each one with your fingers or a soft brush. For yellowed or grimy ABS keycaps, drop in a denture cleaning tablet — it lifts discoloration without harsh chemicals. Rinse each keycap under clean water.
7. Wipe the plate and case
Dampen a microfiber cloth (wring it nearly dry) and wipe the top plate, case edges, and any cable. For sticky spots, dab a little isopropyl alcohol on a cotton swab. The cloth should feel barely damp, never wet — if you can squeeze water out of it, it is too wet for this job.
8. Dry everything completely
This step is where patience pays. Lay keycaps on a towel, stem-side up, and let them air-dry for at least a few hours — overnight is safest. Shake the keyboard gently to dislodge any droplets, then leave it face-down on a towel. Trapped moisture is the number-one cause of “it worked before I cleaned it” key failures.
9. Reassemble using your photo
Press each keycap straight down onto its switch stem until it seats with a soft click. Long keys go back on their stabilizer wires last — line up both ends before pressing. Test every key in a typing test or text editor before you call it done.
How do you clean stabilizers without ruining them?
Stabilizers are the metal-wire mechanisms under long keys (spacebar, enter, shift, backspace) that keep them from wobbling. They are the most fragile part of a keyboard to clean, because bending the wire changes how the key feels.
The safe approach is simple: do not remove them. Leave the wires mounted and clean around them. Brush dust off with a soft brush, wipe the wire gently with a dry cotton swab, and if a stabilizer squeaks or rattles after cleaning, a tiny dab of dielectric grease or Krytox 205g0 on the wire contact points (applied with a toothpick) silences it. Never spray lubricant into the area — overspray migrates into switches and makes them mushy.
One sign you bent a wire during keycap removal: the spacebar feels mushy on one side or sticks down. Power off, remove the keycap, and visually check that the wire is level before reseating.
What should you never do when cleaning a mechanical keyboard?
These are the mistakes that turn a 30-minute clean into a keyboard replacement.
- Never put the keyboard in the dishwasher. The combination of heat, water pressure, and detergent destroys switches, warps the PCB, and dissolves keycap legends. This is the single most common “I killed my keyboard” story in keyboard forums.
- Never soak the switches or the board. Keycaps are plastic and can be soaked; switches contain metal contacts and springs that corrode, and the PCB will short if powered before it is fully dry.
- Never use the keyboard while it is still damp. If even one switch has moisture inside when you plug in, it can short. Wait until every keycap and the board are bone dry.
- Never yank keycaps sideways. Pull straight up. Sideways force bends stabilizer wires and can rip switch housings off the plate.
- Never spray cleaning liquid directly onto the keyboard. Always apply liquid to the cloth or swab first, so you control exactly how much moisture touches the board.
- Never use acetone or nail polish remover. It melts ABS keycaps on contact.
If your keyboard gets a full drink spilled on it: unplug it immediately, remove the keycaps, blot (do not rub) with a towel, and let it dry upside down for 48–72 hours before testing. Sugary drinks may require rinsing the affected switches with isopropyl alcohol — but a spill is triage, not cleaning, and some keys may never fully recover.
How often should you clean your mechanical keyboard?
Match the schedule to your environment, not to a generic calendar. A keyboard in a pet-free office stays cleaner far longer than one on a desk where you eat lunch.
| Cleaning level | How often | What it involves |
|---|---|---|
| Quick dust-off | Weekly | Compressed air bursts + wipe keycaps with a dry microfiber cloth |
| Surface clean | Monthly | Wipe keycaps with a damp cloth, shake out debris, clean the desk area under the board |
| Deep clean (this guide) | Every 3–6 months | Full keycap removal, switch brushing, keycap soak, plate wipe |
| Deep clean, accelerated | Every 2–3 months | Same as above, if you eat at your desk, have pets, or live in a dusty climate |
Pair the routine with your other desk maintenance: when you wipe down the keyboard monthly, check whether your wireless keyboard and mouse combo needs new batteries or a charging session — one monthly ritual covers both.
Frequently asked questions
Can I clean my keyboard without removing the keycaps?
Yes, for light maintenance. Turn the keyboard upside down and shake it, blast between the keys with compressed air, and wipe the keycap tops with a damp microfiber cloth. This handles surface dust fine, but it cannot reach the grime packed around the switch stems — that needs keycap removal, so do a full clean every few months even if you quick-clean weekly.
Is it safe to wash keycaps with soap and water?
Yes — keycaps are just molded plastic and handle warm soapy water perfectly well. Use a drop of mild dish soap, soak 15–30 minutes, rinse, and dry them completely before reassembling. The critical rule is that only the keycaps go in the water, never the switches or the board itself.
Can I use alcohol to clean my keyboard?
Isopropyl alcohol (70% or higher) is safe for spot-cleaning the plate, case, and sticky residue on a cotton swab — it evaporates quickly and does not harm PBT or ABS plastic in brief contact. Do not flood switches with it, and do not use it as a soak bath for keycaps, since prolonged exposure can dull some keycap finishes.
Why do my keys feel scratchy after cleaning?
Scratchy keys after a deep clean usually mean one of two things: fine debris got pushed into the switch housing during brushing, or moisture is still trapped inside. Blast the affected switches with compressed air and give the board another full day to dry. If scratchiness persists, the switch may have lost factory lubricant during an aggressive clean — a tiny drop of switch lubricant on the stem rails fixes it.
How do I clean a keyboard with non-removable keycaps?
Some low-profile and laptop-style boards have keycaps that are not meant to come off. For these, stick to the no-removal routine: compressed air, upside-down shaking, and damp-cloth wiping. Never force keycaps off a board that was not designed for removal — the scissor or butterfly mechanisms underneath break easily and are difficult to reseat.
Does cleaning actually extend a keyboard’s lifespan?
Yes. The grit that accumulates around switch stems acts like sandpaper on the sliding surfaces, accelerating wear and making keys feel scratchy years before their rated lifespan (typically 50–100 million keystrokes). Regular deep cleaning removes that abrasive debris, and keyboards that are cleaned on schedule routinely outlast neglected ones by years of daily typing.
A clean keyboard is also simply a nicer thing to use every day. Thirty minutes twice a year is a small price for keys that feel the way they did on day one.